Table of Contents
Water damage ranks as the second most common homeowner insurance claim category in the United States, with the average payout exceeding $11,000. The claims process, though, is where many homeowners lose money they are legitimately owed. Missed documentation, unclear timelines, and a poor understanding of policy language result in thousands of claims being underpaid or denied outright each year. This guide walks through every stage of a water leak insurance claim, from the first moments after discovery through settlement, so that you can protect your home and your payout.
U.S. homeowners file more than $13 billion in water damage claims every year. The difference between a successful claim and a denied one usually comes down to documentation, timing, and how well you understood your policy before the leak happened.
What Is a Water Leak Insurance Claim?
A water leak insurance claim is a formal request to your homeowners’ insurance provider to cover repair and replacement costs resulting from water damage to your property. Coverage depends on three factors: the cause of the leak, the specific terms of your policy, and how quickly you identify and address the problem.
Most standard homeowners’ insurance policies cover water damage that is classified as “sudden and accidental.” A burst pipe during a cold snap, a failed washing machine supply hose, or a water heater that ruptures without warning all typically qualify. What most policies exclude is damage classified as “gradual,” meaning slow leaks, long-term seepage, deferred maintenance, or deterioration that developed over weeks or months. This distinction between sudden and gradual is the single most important factor in whether a claim is approved or denied, and it is where most disputes between homeowners and insurance companies begin.
Understanding this boundary before you file gives you a significant advantage. If you can demonstrate that damage resulted from a sudden event, and that you responded promptly, your claim stands on much stronger ground.
Step 1: Stop the Leak and Limit Further Damage
The first thing your insurer expects after a water event is that you took reasonable steps to prevent additional damage. This is not optional. Most policies include a “duty to mitigate” clause, and failing to act can reduce or void your claim entirely.
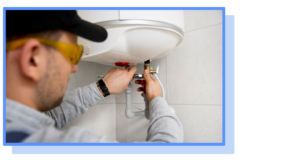
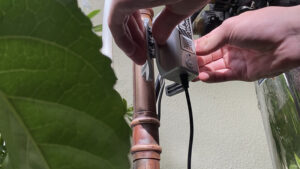
Shut off the water source immediately. If the leak originates from a specific fixture or appliance, close its dedicated shutoff valve. If you cannot isolate the source, shut off the main water supply to the house. Move furniture, electronics, documents, and other valuables away from standing water or saturated areas. If water is pooling on floors, begin removing it with towels, a wet/dry vacuum, or a sump pump. Set up fans or a dehumidifier to start the drying process.
Mold timeline: Mold can begin developing within 24 to 48 hours of sustained moisture exposure. If you can’t get the area fully dry within 48 hours, document the conditions thoroughly so insurers cannot argue the mold was preexisting.
You can and should arrange emergency mitigation, such as calling a water damage restoration company for extraction and professional drying. What you should not do is authorize permanent repairs before your insurance adjuster has inspected the damage. Emergency work to stabilize the situation is expected. Replacing drywall, flooring, or cabinetry before the adjuster visits can lead to disputes over what was actually damaged and what the repair should cost.
Mold can begin developing within 24 to 48 hours of sustained moisture exposure, so prompt drying is critical. Detailed information on how secondary damage compounds costs is available in Bluebot’s guide to the high price of secondary water damage.
Step 2: Review the Policy and Notify the Insurance Provider
Before you pick up the phone with your insurer, take 15 minutes to review your policy documents. Identify your coverage categories: dwelling coverage (the structure), personal property coverage (your belongings), and additional living expenses, known as ALE (temporary housing if your home becomes uninhabitable). Note your deductible amount and any specific water damage exclusions or endorsements.
Look for “trace and access” language, which indicates whether your policy covers the cost of locating a hidden leak, not just the repair of the resulting damage. Some policies include this coverage; others require an add-on endorsement.
Contact your insurance company promptly. Delayed reporting is one of the most common reasons claims are reduced or denied. When you call, provide the basics: your policy number, the date and time you discovered the leak, the apparent cause (if known), and the affected areas of the home. Keep your description factual and consistent. You do not need to speculate about causes or assign blame during this initial call. Simply report what happened, what you observed, and what emergency steps you have already taken.
Water damage costs U.S. homeowners more than $13 billion annually. For a broader look at how these costs break down, visit Bluebot’s water damage statistics resource.
Step 3: Document the Damage and Organize Evidence
Strong documentation is the foundation of a successful water leak insurance claim. Without it, you are relying entirely on the insurance adjuster’s assessment, and that adjuster works for the insurance company, not for you.
Photograph every affected room, surface, and item from multiple angles. Capture wide shots that show the extent of the damage, alongside close-ups of specific areas: waterlogged flooring, stained drywall, warped baseboards, and damaged personal property. Record video as well, narrating what you see and when you discovered it. If the leak source is visible and accessible, photograph it directly.
Create a written inventory of damaged items. Include descriptions, approximate age, and estimated replacement cost for each item. If you have original receipts or purchase records, gather those too. Save every receipt related to the event: emergency plumber calls, water extraction services, temporary fans or dehumidifiers, hotel stays if you had to relocate, and any supplies used for cleanup.
Organize all of this into a single file, whether physical or digital. Log every phone call, email, and interaction with your insurance company, including the name of the person you spoke with, the date, and what was discussed.
If you need help identifying the source of the leak before filing, this step-by-step guide to finding a water leak in your house walks through meter tests, visual inspections, and isolation methods.
Step 4: File the Insurance Claim
When you formally file, include the essentials: your policy number, the date and time the leak was discovered, the suspected cause, all affected areas of the home, and a summary of the emergency actions you have already taken. Attach your photos, video, and inventory.
Accuracy matters more than volume here. Overstating damage invites scrutiny, while omitting affected areas leaves money on the table. Describe what happened factually, consistently, and completely. If you are unsure about the cause, say so. Guessing or contradicting yourself across multiple conversations gives adjusters a reason to question your account.
One area homeowners frequently overlook: if your home is uninhabitable during repairs, your policy likely includes additional living expenses coverage. Document hotel costs, restaurant meals, and other reasonable expenses you incur while displaced. These costs add up quickly and are recoverable under most standard policies.
Step 5: Prepare for the Adjuster and Review the Estimate
Your insurance company will assign an adjuster to inspect the damage in person. Remember that this adjuster is an employee or contractor of the insurer. Their job is to assess the damage accurately, but their financial incentive aligns with the company, not with you.
Before the adjuster arrives, organize your documentation file so you can walk through each affected area with supporting evidence. Point out both obvious and less visible damage: water stains on ceilings, soft spots in flooring, musty odors behind walls, and warped cabinetry. Secondary damage, such as mold potential, electrical corrosion, and structural compromise, is easy to miss during a quick walkthrough, so flag these concerns directly.
After the inspection, you will receive a damage estimate and a settlement offer. Do not accept the first number without review. Obtain two or three independent repair estimates from licensed contractors and compare them against the adjuster’s figures. Common gaps include underestimating drying and dehumidification costs, omitting mold remediation, undervaluing personal property, and excluding additional living expenses.
If the estimate falls significantly short, respond with your contractor quotes and specific line items that were missed or undervalued. Adjusters deal with hundreds of claims. A homeowner who presents organized, evidence-backed rebuttals typically receives a revised offer.
Step 6: Respond to Delays, Low Offers, or Denials
Not every claim goes smoothly. If your insurance company delays processing, makes a low settlement offer, or denies the claim entirely, you have options.
Start by requesting a written explanation. Insurers are required to provide specific reasons for denials or reductions. The most common reasons for denial of water damage claims include classification as gradual rather than sudden damage, allegations of homeowner negligence or deferred maintenance, delayed reporting of the incident, and insufficient documentation of the damage scope.
Respond with factual, specific evidence that addresses the stated reason. If the insurer claims the damage was gradual, provide evidence of when the leak actually started: maintenance records, plumber inspection reports, or timestamped monitoring data that shows normal flow patterns followed by a sudden change. If documentation is cited as the issue, supplement your file with additional photos, contractor assessments, or expert opinions.
For claims exceeding $10,000, or for any denial you believe is unjustified, consider hiring a public adjuster. Public adjusters work independently on your behalf, typically for a percentage of the settlement (usually 10 to 15 percent), and they often recover significantly more than homeowners negotiate on their own. For particularly complex disputes, consulting an attorney who specializes in insurance claims may be warranted.
Step 7: Prepare Better for Future Water Leak Claims
The most effective way to protect a future claim is to build the kind of documentation that insurers cannot dispute before a leak ever happens.
Schedule annual plumbing inspections and keep written records of every service visit. Replace washing machine hoses, water heater connections, and other high-failure components on the manufacturer’s recommended timeline. Maintain records showing when these replacements occurred. This maintenance history directly counters the two most common denial arguments: negligence and gradual deterioration.
Smart water monitoring takes preparation further by creating a continuous, timestamped record of your home’s water flow. Bluebot’s WiFi Smart Water Meter captures 43,200 data points per day, providing second-by-second flow data that shows exactly when abnormal usage began. If a leak occurs, this data establishes the event as sudden, not gradual, because you can point to the precise moment when flow patterns changed. That distinction often determines whether a claim is approved or denied.
For homeowners looking for the most economical entry point, the Bluebot Mini delivers the same real-time leak alerts and flow monitoring for under $260, and many insurers offer 5 to 10 percent premium discounts for homes equipped with smart leak detection systems. Property owners managing vacation homes, rental units, or buildings with detached structures can monitor remotely with the Bluebot EcoLink, which operates over long-range wireless up to 1,000+ feet from your router.
Explore how flow-based monitoring compares to point sensors in the smart water leak sensors guide, or review whole-home options and insurance discount eligibility in the whole-house water leak detection systems buyer’s guide.
Common Mistakes to Avoid When Filing a Water Leak Claim
Certain errors can weaken or tank an otherwise legitimate claim. Knowing what to avoid is as important as knowing what to do.
Delaying notification to your insurer, even by a few days, gives them grounds to question why you waited. Failing to shut off the water source raises negligence concerns. Cleaning up damage before documenting it with photos and video removes evidence you cannot recreate. Throwing away damaged items before the adjuster inspects them eliminates proof of loss. Losing receipts for emergency services, temporary housing, or mitigation costs means those expenses may not be reimbursed.
Starting permanent repairs before the adjuster reviews the damage is particularly damaging to claims. Emergency stabilization is fine. Gutting a bathroom is not. The adjuster needs to see the actual damage to authorize appropriate repair costs.
Making inconsistent statements about timing, cause, or scope across multiple conversations creates credibility problems that adjusters are trained to identify. Pick a factual account, stick to it, and let the evidence speak.
Finally, many homeowners assume their policy covers every type of water damage without checking exclusions. Sewer backups, flooding from external sources, and gradual pipe deterioration are commonly excluded unless you have purchased specific endorsements. Review your policy now, before you need it.
Conclusion
A successful water leak insurance claim comes down to speed, documentation, and clarity. Act fast to stop the water and prevent secondary damage. Document everything before you clean up. File promptly, stay consistent, and be prepared to push back on estimates that fall short of actual repair costs.
The strongest position, though, is not reacting to a disaster. Having the data and maintenance history makes your claim straightforward from the start. Bluebot smart water meters install in roughly 15 minutes without cutting pipes, then monitor your entire plumbing system around the clock. When a leak occurs, timestamped flow data shows exactly what happened and when, providing the kind of evidence that supports swift claim approval. And with insurance premium discounts of 5 to 10 percent available for homes with leak detection, along with utility rebates up to $200, the investment often pays for itself before you ever need to file.
Questions about installation, pipe compatibility, or alert setup? Visit the Bluebot FAQ.
Frequently Asked Questions
Most standard homeowners’ insurance policies cover water damage that results from sudden and accidental events, such as a burst pipe or a failed appliance. Damage caused by gradual leaks, long-term seepage, or deferred maintenance is typically excluded. The specific terms vary by policy, so reviewing your coverage before a leak occurs is the best way to understand what qualifies.
Yes. Most policies include a duty to mitigate, meaning you are expected to take reasonable steps to prevent further damage as soon as you discover a problem. Shutting off the water, removing standing water, and starting the drying process all fall within this expectation. Failure to mitigate can result in a reduced or denied claim for secondary damage that could have been prevented.
Document the damage with timestamped photos, video, and a written inventory of affected items. Save receipts for all emergency services, mitigation costs, and temporary living expenses. Maintain a log of every communication with your insurer. Smart water monitoring data provides additional timestamped evidence of when the abnormal flow started, strengthening your ability to prove the event was sudden.
Emergency mitigation is expected and should begin immediately. Permanent repairs, however, should typically wait until the adjuster has inspected the damage and provided authorization. If permanent repairs are urgent for safety reasons, document the pre-repair condition thoroughly, including photos and video, before any work begins.
Request a written explanation from your insurer detailing why the claim was delayed, reduced, or denied. Respond with additional documentation, contractor estimates, or expert assessments that address the stated reason. If the dispute involves a significant amount, a public adjuster or insurance attorney can advocate on your behalf and often recovers more than the initial offer.
Mold coverage varies widely by policy. Some standard homeowners’ policies include limited mold coverage when it results from a covered water event. Others exclude it entirely or cap reimbursement at a low amount. Prompt drying and documented mitigation efforts play a significant role in whether mold-related costs are covered, since insurers may argue that mold growth resulted from delayed response rather than the original leak. If you are concerned about mold, renters and landlords can review their coverage options here.