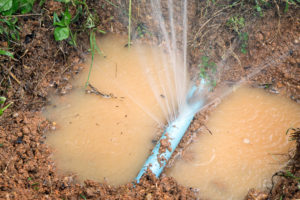
A single undetected water leak can waste over 10,000 gallons per year while silently causing structural damage that leads to repair bills averaging nearly $14,000. Whether you’ve noticed an unexplained spike in your water bill, heard running water when all fixtures are off, or spotted a suspicious wet spot, finding the source quickly is essential. This guide walks you through a systematic approach to leak detection—from confirming a leak exists to pinpointing its location—so you can take action before a small drip becomes a major problem.
Step 1 – Confirm That You Actually Have a Water Leak
Before tearing into walls or calling a plumber, verify that a leak actually exists. The simplest method uses your water meter as a diagnostic tool.
Start by turning off all water-using fixtures and appliances in your home, including faucets, dishwashers, washing machines, ice makers, and irrigation systems. Locate your water meter (typically near the street in a covered box or inside near the main shutoff) and note the current reading. Wait 1-2 hours without using any water, then check the meter again. If the reading has changed, water is flowing somewhere in your system—and if nothing was running, that flow indicates a leak.
Many meters also have a low-flow indicator (a small triangle or dial) that spins when even tiny amounts of water pass through. Movement on this indicator with all fixtures off suggests a slow leak that might not register on the main dial over short periods.
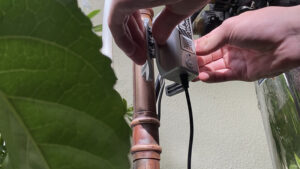
For ongoing monitoring, Bluebot’s smart water meters automate this process entirely. With 43,200 data points captured daily—a reading every 2 seconds—the system detects continuous water flow and sends immediate alerts when usage patterns suggest a leak. This eliminates the guesswork of manual meter reading and catches problems while you’re asleep, at work, or on vacation.
Step 2 – Identify the General Area of the Leak
Once you’ve confirmed water is flowing when it shouldn’t be, systematic investigation helps narrow down where the leak is occurring. Start with the most common culprits before moving to harder-to-reach locations.
Check toilets first. Toilet leaks are the most common household water wasters, often running silently without obvious signs. Remove the tank lid and add a few drops of food coloring to the tank water. Wait 15-20 minutes without flushing. If colored water appears in the bowl, the flapper valve is leaking and needs replacement—a simple fix that can save thousands of gallons monthly.
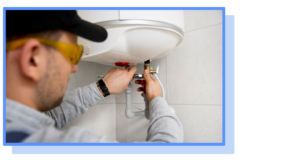
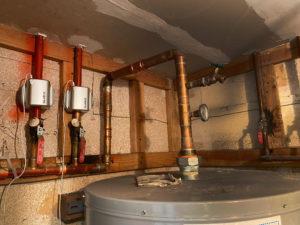
Inspect visible plumbing. Look under every sink, around the water heater, behind the washing machine, and near the dishwasher. Check for pooling water, corrosion on pipes or fittings, water stains on cabinets or flooring, and any warped or discolored materials. Don’t forget outdoor faucets and hose bibs, which can develop slow leaks that go unnoticed.
Look for hidden indicators. Unexplained damp spots on walls, ceilings, or floors often signal leaks in concealed plumbing. Musty odors, especially in specific areas, may indicate moisture accumulation behind surfaces. Listen for the sound of running water when fixtures are off—even faint dripping or hissing can help locate a hidden leak.
Monitor water pressure. A sudden drop in water pressure throughout your home may indicate a significant leak in the main supply line. Pressure issues isolated to specific fixtures suggest localized problems in branch lines.
Step 3 – Narrow Down the Source Using Isolation and Monitoring
When visual inspection doesn’t reveal the leak, isolation testing helps identify which section of your plumbing system is affected.
Most homes have shutoff valves for individual fixtures and appliances. Systematically close these valves one at a time, checking your water meter after each closure. When you shut off the valve serving the leaking section, the meter’s low-flow indicator will stop moving (or smart meter alerts will cease). This process of elimination identifies which supply line contains the leak without opening any walls.
For homes with accessible main branch shutoffs, you can isolate entire sections at once. Close the valve serving bathrooms, check the meter, then reopen and close the kitchen supply. This broader approach saves time when leaks are significant enough to register clearly.
If you have a Bluebot Mini or WiFi meter installed, real-time monitoring shows exactly when flow stops as you close each valve. The app displays usage changes instantly, making isolation testing faster and more precise than watching a mechanical meter. For properties with detached structures, Bluebot EcoLink monitors buildings up to 1,000+ feet from your router—ideal for guest houses, workshops, or barns where leaks might otherwise go unnoticed for weeks.
Step 4 – Decide Between DIY Repair and Professional Help
After identifying the leak’s general location, assess whether repair is within your capabilities or requires professional expertise.
DIY-appropriate repairs include replacing toilet flappers and fill valves, tightening loose compression fittings under sinks, replacing worn washers in faucets, and reconnecting loose washing machine supply hoses. These fixes require minimal tools and no plumbing experience. Most hardware stores carry replacement parts, and online tutorials make the process straightforward.
Call a professional when leaks involve pipes inside walls, under slabs, or underground. Also seek professional help for any leak you can hear but not locate, situations requiring soldering or pipe replacement, water heater issues beyond simple drain valve problems, and any repair beyond your comfort level—water damage from a failed DIY repair often costs more than a plumber’s service call.
When you do call a plumber, provide specific details about what you’ve learned: which isolation valve stopped the flow, where you noticed moisture or sounds, and how long the problem has existed. This information helps them locate the issue faster, reducing diagnostic time and labor costs.
Document everything for insurance purposes. Photograph any visible damage, note when you first discovered the problem, and save water usage records. Smart water monitoring data provides timestamped evidence of when abnormal flow began—documentation that can support insurance claims by establishing the leak as a recent “sudden” discovery rather than long-term “gradual” damage that policies typically exclude.
Conclusion
Finding a water leak in your house doesn’t require expensive equipment or professional detection services in most cases. A systematic approach—confirming the leak exists, checking common problem areas, and using isolation testing to narrow down the source—allows most homeowners to identify problems before calling a plumber. The key is acting quickly, since even small leaks cause progressive damage that becomes exponentially more expensive over time.
For ongoing protection, continuous water monitoring eliminates the uncertainty of wondering whether a leak exists. Bluebot smart water meters install in approximately 15 minutes without cutting pipes, then monitor your water flow 24/7 and alert you the moment usage patterns suggest a problem. Whether you’re a homeowner wanting peace of mind, a landlord managing properties remotely, or simply tired of surprise water bills, real-time monitoring catches leaks in hours rather than weeks—often before you’d ever notice a wet spot or hear running water.