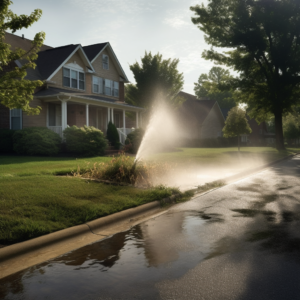
Sprinkler leak detection is a four-step process. You read the symptoms in the lawn, confirm the loss by reading the meter, isolate the failing zone, then pinpoint the break before anyone digs. An in-ground sprinkler system hides most of its plumbing underground. So a leak rarely announces itself the way a dripping faucet does. It shows up indirectly instead: a spongy patch of turf, a zone gone weak, a water bill that climbed for no obvious reason. This guide walks the whole procedure with ordinary tools. It also marks the point where a homeowner should stop and call a licensed irrigation contractor.
The stakes are easy to underestimate. According to the U.S. Environmental Protection Agency’s WaterSense program, an irrigation system with a leak just 1/32 inch across (about the thickness of a dime) can waste roughly 6,300 gallons a month. That commonly adds $50-$200 to a seasonal bill. The EPA also estimates the average American home loses nearly 10,000 gallons a year to leaks of all kinds, and that 10% of homes lose 90 gallons or more every day. Outdoor watering makes up about 30% of household water use nationally, and up to 70% in dry regions. Roughly half of that outdoor water is wasted to inefficiency. EPA WaterSense runs its annual Fix a Leak Week on March 16-22, 2026, which is a useful calendar peg for the spring inspection in Step 4.
Key facts at a glance
- Time required: 1-3 hours for a first full pass over an average residential system
- Difficulty: Beginner to intermediate. Detection itself needs no digging.
- Core tools: meter access, a pressure gauge, a long screwdriver or soil probe, marking flags
- Typical DIY parts cost: $5-$50 · Typical professional repair: $150-$800
- Stop-and-call-a-pro line: any fix needing excavation deeper than 12-18 inches, or work near a foundation, property line, or buried utility

Common Signs You Have a Sprinkler Leak
Spend ten minutes reading the yard before you test anything on your system. Symptoms tell you whether to investigate, and roughly where to start. That saves hours of trial and error later.
Visible clues in the lawn
Wet spots that linger for hours after a cycle ends are the classic tell. A failed head or a cracked lateral line keeps the soil saturated long after the controller shuts off. The turf above feels spongy underfoot. It often grows greener and faster than everything around it. Moss or algae in a spot that was never damp points at the same cause: a constant, low-volume moisture source.
The opposite symptom is just as useful. Brown or dry patches inside a zone that should be watering normally mean water is escaping before it reaches the heads. If two zones run identical schedules and only one looks healthy, start with the weak one.
Bubbling soil or a small geyser during a cycle means pressurized water is escaping a fitting or a buried pipe. Do not shrug off a small bubble. It is a compromised joint, and it will widen. Finally, walk the perimeter of the house. Unexplained moisture at the foundation, seepage along a basement wall, or soil eroding away from the structure can all be landscape irrigation pushing water against the building. That symptom is worth acting on the same day.
Performance and water-bill clues
System behavior usually shifts before anything becomes visible. Lawn sprinklers that barely pop up, spray that mists instead of throwing a stream, or a general loss of water pressure all suggest a leak bleeding system pressure upstream. Sputtering from a spray head that used to run cleanly means air is entering through a compromised line. A zone that now takes several extra seconds to start is telling you the system must fill a hole before it can pressurize.
Your bill is the most objective early signal you have. A modest leak running at 1 gallon per minute wastes 43,200 gallons per month. That is enough to add $40-$150 to a bill, depending on local rates. If usage climbs during irrigation season with no schedule or weather change, treat it as a leak until proven otherwise.
You can sanity-check that in under an hour. Record the reading, stop all indoor and outdoor water use for 30-60 minutes, then look again. Any movement means water is escaping somewhere. If you have never tried it, our guide to reading a water meter covers the dials and the leak indicator dial.
What You’ll Need
Sprinkler leak detection needs less equipment than most homeowners expect. Nothing on this list requires digging.
- Access to your water meter: the most reliable instrument you own
- A pressure gauge with a hose-bib fitting, $10-$25 at any hardware store
- A long screwdriver or metal soil probe for checking saturation
- Marking flags or spray paint to record suspect areas
- Your irrigation controller, or the manual bleed screw on a zone valve
- A spare pop-up head and slip-fix couplings if you plan to repair what you find
- Optional: a smart water meter for continuous flow monitoring instead of spot checks
How to Find a Sprinkler Leak in Four Steps
Work the process in order. Each step is cheaper and less invasive than the one after it. A leak caught in Step 1 costs a replacement head. The same leak found in Step 3 costs an excavation.

Step 1 – Inspect Visible Components and Common Failure Zones
Start with the parts you can see, because most sprinkler leaks sit above ground and cost almost nothing to fix. Run one zone at a time from the controller. Walk the coverage area while it runs and watch head operation, spray pattern, and the ground around each head.
Cracked sprinkler heads are the most common failure by a wide margin, and the easiest to spot. Look for splits in the body or riser. Look for a nozzle knocked out of alignment and spraying off-target. Look for heads that fail to retract when the zone shuts down. A single cracked sprinkler head can flood a small area inside one cycle. Mower strikes, freeze damage, and plain age cause most of it. A rotor head buried in overgrown turf is another frequent culprit, since the grass deflects the stream and hides the problem.
Open every valve box next. Standing water inside a box is strong evidence of a leaking zone control valve or a fitting on the manifold. Corroded parts tell you the moisture has been there a while. Check that the solenoid valve wiring is intact and that nothing was loosened by soil movement. Many valve boxes leak unnoticed for years, because the water drains into surrounding soil instead of surfacing.
Then inspect the backflow preventer and every stretch of pipe that transitions from buried to above ground. Those transitions carry the most stress in the system. Temperature cycling, UV exposure, and physical impact all concentrate there. As a result they usually fail before the buried runs they connect to. Check the anti-siphon valve too if your setup uses one. Many jurisdictions also require annual backflow assembly testing by a certified tester, so confirm what your local plumbing code expects before you service that device.
While the zone runs, stop and listen. A hiss means pressurized water escaping. A gurgle means air is entering somewhere. Running water where no head sits nearby is often the first evidence of an underground pipe failure. Soil carries that sound well, so a quiet evening pass is worth the time. This is the low-tech half of sprinkler troubleshooting, and it solves more problems than people expect.

Step 2 – Test for Hidden or Underground Leak Indicators
When the visible inspection comes up empty, switch from looking to measuring. Two instruments do the work: a pressure gauge and your meter.
Thread the gauge onto a hose bib. Record static pressure with everything off, then run a single zone and record it again. Compare the zones against each other. A zone showing a much larger pressure drop than its neighbors is losing water in its supply line. Run each zone alone for 10-15 minutes and watch. Note any that take longer to pressurize, throw weaker spray, or behave erratically. Healthy residential systems usually sit somewhere between 30 and 50 psi at the head, so a reading far below that is a signal in itself.
After you shut down, listen at the valve boxes and along the known pipe runs. A leak on a pressurized mainline upstream of the zone valves keeps running even when the system is idle. That makes it audible in a way a leak on the lateral lines is not. Do this when ambient noise is low. Early morning and late evening work best.
Then run the definitive test. A water meter leak test is the one measurement that separates a real leak from a landscaping quirk, because it does not care what you believe is happening. It simply reports whether water is moving. Shut off every indoor and outdoor fixture for a measured window of 2-4 hours. Start by reading the meter, then take a second meter check when the window closes. Any movement confirms an active leak, and that simple meter test is the backbone of the whole diagnosis.
This whole-house version cannot tell you whether the loss is indoor plumbing or irrigation. So isolate next. Close the shutoff serving only the irrigation lines and repeat the shut-off test. If the meter goes still with irrigation isolated, but moves again when the system is live, the leak is in your sprinkler lines. That is meter-based verification, and it is the moment guesswork ends.
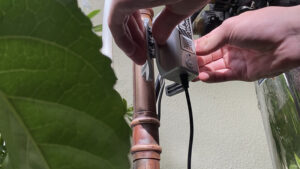
Manual testing has real limits here. Watching the meter gives you a snapshot. It catches whatever leaks during the window you happened to pick, and a small or intermittent fault can hide between checks for weeks. Continuous flow monitoring closes that gap. The Bluebot WiFi Smart Water Meter clamps onto the main line or a dedicated irrigation supply without cutting pipe. It tracks flow around the clock and alerts you when usage departs from the baseline it has learned. For irrigation-only coverage, the Bluebot Mini does the same job in a smaller body. Bluebot rates it IP68 for outdoor use, and lists power options of 24 VAC from an irrigation controller or a standard 120V outlet, so there is no battery to manage.
The honest framing of that benefit is about timing, not percentages. A smart water monitor reports abnormal flow within minutes of it starting. A water bill reports the same leak a full billing cycle later. Everything wasted in between is the difference.

Step 3 – Confirm Leak Location and Choose Correct Repair Method
Once a zone is implicated, pinpointing the leak comes before anyone lifts a shovel. Excavation is the expensive, destructive part of this job. Every hour spent locating an irrigation leak saves several spent digging for it.
Flag every surface symptom: soggy ground, unusually green turf, erosion. Then shut the irrigation off completely for 24-48 hours. Areas that dry out were probably just over-watered. Areas still wet with the system off are being fed by something, and that something is your leak.
Now start probing the soil in those areas with the long screwdriver. Saturated ground offers noticeably less resistance than well-drained ground. A screwdriver probe worked across a grid will usually outline the wet area well enough to aim one small excavation instead of a trench. Soil probing like this costs nothing, and the saturation check it gives you prevents the most common mistake in leak hunting, which is digging in the wrong place first.
Confirm with a simple zone test, run zone-by-zone. Run each zone alone for 15-30 minutes while you watch the meter or your monitoring app. The leaking zone consumes measurably more than its neighbors, even when every head appears to work correctly. Isolating a zone this way turns a yard-wide problem into a ten-foot one.
If the fault still will not give up its position, bring in acoustic leak detection. An irrigation specialist will use a ground microphone sensitive enough to hear pressurized water escaping underground, and can mark the spot without exploratory digging. That service typically runs $150-$400. It is routinely cheaper than restoring a lawn you guessed wrong on.
Deciding between a DIY repair and a professional
Replacing a cracked head, tightening a fitting, or patching visible poly tubing with a slip-fix coupling is well within most homeowners’ reach. Parts run $5-$50. Heads generally unscrew from the riser, and damaged above-ground PVC pipe can be cut out and coupled back together with hand tools.
Call a certified irrigation professional when the leak sits on a buried pipe, when a valve needs replacing, when the repair would require excavation deeper than 12-18 inches, or when the suspect area is near your foundation, a property line, or a known utility run. Contractors carry liability insurance. They own the tooling for the various pipe materials and burial depths involved. Most importantly, they do this work without guessing where the gas line is. Professional irrigation repair commonly falls between $150-$800 as of 2026, depending on depth, access, and materials. That is modest against the ongoing waste and possible structural damage of leaving a leak in the ground. The EPA also recommends having a system checked by a WaterSense-certified irrigation professional, which is a useful filter when comparing bids.
Before you dig: call 811
This step is not optional: call before you dig. Contact 811, the national utility locating service, and request a locate before breaking ground anywhere on the property. It is free, it is required in most jurisdictions, and irrigation trenches are shallow enough to reach communications, electrical, and gas lines. Call 811 and wait for the marks before the shovel moves. Separately, cut power to the irrigation controller before handling valve wiring, and stop immediately if you uncover anything you did not expect.

Step 4 – Prevent Future Leaks with Regular Maintenance
Most failures are the visible end of a problem that has been developing for a season or more. The cheapest leak is the one caught during scheduled maintenance.
Build a seasonal inspection habit
Inspect twice a year. Once at spring start-up, before the system carries a full season of pressure, and once at fall shutdown, before winter arrives. Spring catches freeze damage, soil settling, and aging parts. Fall catches whatever the season introduced, before winter makes it worse. Fix a Leak Week in March is a convenient anchor for the first pass.
Run every zone during each seasonal inspection and walk the coverage area. Clear clogged nozzles. Straighten heads knocked out of alignment. Replace anything cracked. Check valve boxes for standing water, snug loose fittings, and confirm the controller and rain sensor still behave. In cold climates, winterization matters more than anything else on this list: drain the lines, clear residual water with a system blowout using compressed air, and insulate the valve boxes and the backflow device. Water left in a pipe over winter expands as it freezes, and that is the single most common origin of the leaks people discover the following spring.
Replace components before they fail
Irrigation hardware wears on a fairly predictable schedule, so planned replacement usually beats an emergency repair in July. As approximate service life, sprinkler heads typically last 10-15 years before internal seals degrade and nozzles wear from grit. Zone valves generally run 12-20 years before diaphragms stiffen and solenoids fail. Rubber gaskets and seals throughout the system deteriorate over 15-20 years regardless of use. Systems piped in the 1980s-1990s deserve closer watching, since older PVC formulations tend to be more brittle than current material.
Two upgrades pay for themselves in avoided leaks. Pressure-regulating valves keep municipal supply from over-stressing heads and joints, a leading cause of failures in high-pressure neighborhoods. Smart controllers match run times to weather and soil conditions, which cuts both over-watering and the pressure cycling that works fittings loose.
Monitor continuously between inspections
Inspections happen twice a year. Leaks do not schedule themselves around them. A fault that starts the week after your spring check has months to run before the fall one finds it. A smart leak detector on the irrigation supply covers that interval with round-the-clock flow sensor data, flagging a leak, a stuck valve, or a zone that never shut off. Bluebot’s patented clamp-on installation takes about 15 minutes and does not require cutting into your plumbing, which is what makes retrofitting an existing system practical rather than a project.
Putting it together
Finding a sprinkler leak is a process of elimination, worked from cheapest evidence to most expensive. Symptoms first, then the meter, then the zone, then the exact spot. Most homeowners land the diagnosis in Step 1 or Step 2, and most of those repairs cost less than a tank of gas. Tracking down the leak early is what keeps it cheap. The leaks that get expensive are the ones that run undetected: small, buried, symptomless, and quietly billing you every month until something turns green or the invoice arrives.
That is the real argument for pairing a good manual routine with smart water monitoring technology. Irrigation leak detection by inspection finds what exists on the day you look. A monitor watches the eleven months in between. If you would rather not wait for brown patches or a surprise bill to complete your sprinkler leak diagnosis, add continuous monitoring to your irrigation supply and let the system report its own problems.
Frequently Asked Questions
Can a sprinkler system leak when it is turned off?
Yes. Everything upstream of the zone valves stays pressurized around the clock, so a break on the mainline or at a valve box fitting keeps losing water even when no zone is running. Lateral lines past those valves only leak while their zone is active. If your meter moves with the controller off, suspect the pressurized side first.
How much does it cost to fix a sprinkler leak?
A do-it-yourself repair usually costs $5-$50 in parts for a replacement head, a fitting, or a slip-fix coupling. Professional irrigation repair commonly runs $150-$800 as of 2026, depending on burial depth, access, and materials. If the leak has to be located first, acoustic leak detection typically adds another $150-$400 to the job.
Why is my water bill high when I cannot see any wet spots?
Underground irrigation leaks usually drain into the surrounding soil instead of surfacing, so the bill moves long before the lawn does. EPA WaterSense estimates that a leak just 1/32 inch across can waste about 6,300 gallons a month. Shut off every fixture for 30-60 minutes and take a meter check; any movement confirms water is escaping somewhere.
Where do sprinkler leaks happen most often?
Most failures show up in three places: cracked or stuck sprinkler heads, fittings and zone valves inside the valve box, and the points where pipe transitions from buried to above ground. Those transitions absorb the most stress from temperature swings, UV exposure, and impact. Buried lateral lines fail less often but are the hardest and costliest to reach.
How long does it take to find a sprinkler leak?
Plan on 1-3 hours for a first full pass, covering a walking inspection of every zone, a pressure comparison, and a water meter leak test. Confirming an exact spot takes longer, because the dry-out check needs the system off for 24-48 hours. Leaks that produce no surface symptoms may need a professional locate to resolve.
When should I call an irrigation professional instead of digging myself?
Call a professional when the repair needs excavation deeper than 12-18 inches, when a buried pipe or a zone valve is involved, or when the leak sits near a foundation, a property line, or a known utility run. Always contact 811 for a free utility locate before any digging. EPA recommends choosing a WaterSense-certified irrigation professional.
What causes sprinkler pipes to crack underground?
Freeze-thaw cycling is the most common cause in cold climates, because water left in a line expands as it freezes and splits the pipe. Soil settling and root pressure work joints loose over time, and lawn equipment strikes damage shallow risers. Systems piped in the 1980s-1990s can also be more brittle than current material.