Finding a water leak inside a wall is a three-stage diagnostic procedure, and Bluebot exists because stage one is the one most homeowners cannot do: knowing water is moving when nothing should be running. First you confirm that water is actively flowing. Then you narrow the source without cutting drywall. Finally you decide whether to repair it yourself or escalate. The order matters. A water meter test proves a leak exists before you spend anything hunting for it. A moisture meter scan then tells you where to open the wall: often one small access hole instead of a demolished stud bay. Worked in sequence, this in-wall leak detection routine lets most homeowners hand a plumber a location instead of a guess.
Speed matters as much as accuracy. According to EPA WaterSense (2026), household leaks waste nearly 10,000 gallons of water per home each year, and roughly 10 percent of homes have leaks wasting 90 gallons or more per day. The national total is still near 1 trillion gallons annually. The Insurance Information Institute (Triple-I, 2026) ranks water damage and freezing as the second most frequent homeowners claim, averaging $13,954 across the 2018-2022 period. A leak behind a wall that runs three weeks is no longer a plumbing job. It is a restoration project.
What You’ll Need Before You Start
Hidden wall leak detection is mostly patience plus two low-cost instruments, so locating a leak behind drywall needs no specialist kit. Gather these first:
- Your water meter. The whole-house meter is the one tool that proves flow is happening somewhere. Find it and learn to read its low-flow indicator.
- A moisture meter. A pinless moisture meter runs about $30-50 at hardware stores. It reads moisture content through paint and drywall without leaving holes.
- An infrared camera or infrared thermometer. Optional, but a thermal scan finds the cool spots that evaporation creates.
- A flashlight and your phone. Raking light exposes surface distortion. Photos become your documentation.
- Access to fixture shutoff valves. Under sinks, behind toilets, and at the washing machine.
Time: plan 90 minutes to half a day. The leak indicator check alone needs a quiet 1-2 hour window with nothing running. Cost: under $60 if you already own a flashlight. Skill level: no plumbing experience required. This procedure locates the problem; it does not repair it.
One caution first. Not every water stain means a live leak. Some come from a past failure already fixed. Others come from condensation on cold supply lines, or from water that traveled a long way along framing. Confirm before you cut.
The Six-Step Wall Leak Detection Procedure
Step 1: Read the Wall for Active-Leak Signs
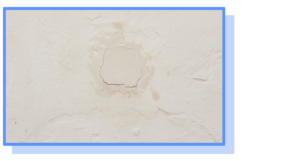
Start with your eyes, hands, and nose. Fresh water stains have defined edges that are still expanding, and the drywall feels damp rather than merely discolored. Bubbling paint, peeling paint, or soft drywall that gives under thumb pressure all point to moisture trapped behind the surface. Warped drywall and spreading discoloration suggest the wetting has continued for a while. A musty odor concentrated in one area signals hidden accumulation, and visible mold growth means the cavity has been wet for days. Now make the house silent and listen. Dripping, hissing, or a faint rush inside the wall is loudest when supply pressure peaks in the morning. Note roughly how long the signs have been visible; that timeline drives every decision in Step 6. For a deeper symptom checklist, see our guide to the early signs of water damage in walls.
Step 2: Confirm Flow with a Water Meter Test
The water meter test separates a real leak from an old stain. Shut off every fixture and appliance, including ice makers and irrigation. Then note the meter reading or watch the low-flow indicator over a 1-2 hour window. Any movement confirms water is flowing somewhere in your system. The meter movement test is blunt: it proves flow exists, not where. If the whole-house meter test shows usage and you have already ruled out running toilets, dripping faucets, and appliances, a concealed wall leak becomes the leading explanation. The same water-meter check anchors our broader walkthrough on how to find a water leak in your house; here you apply it to one suspect wall.
Step 3: Narrow the Branch with Isolation Testing
Isolation testing differs from the whole-house meter reading test by shrinking the search to a single branch. Close the dedicated valve for one fixture at a time, then re-watch the meter. If the bathroom shutoff valve test stops the movement, the leak sits in that fixture’s supply line. This isolation test is a process of elimination that costs nothing but time. While you work, map what actually runs behind the affected wall. Supply lines and drain pipes travel vertically between floors and horizontally through floor cavities. A supply-line leak differs from a drain-line leak by running continuously under pressure; a waste line or drain line only carries water when something upstream drains. Damage near a bathroom, kitchen, or laundry wall almost always implicates one of the two.
Step 4: Map the Moisture Without Cutting Drywall
Now localize. A moisture meter scan maps moisture content through drywall without cutting it, and it belongs to the non-destructive stage for a reason: a wrong guess costs a wall. Work a grid scan, roughly one moisture reading every 6 inches, and write each number on a sketch. This moisture mapping turns a vague damp patch into a gradient. The highest moisture-content reading clusters nearest the source. Infrared thermal imaging complements the wall moisture scan by detecting the temperature anomalies that evaporative cooling produces, which read as cool patches on a thermal camera or handheld IR thermometer. One caveat governs the whole moisture survey. Water follows gravity and the path of least resistance, traveling along joists, pipes, and wire runs. A first-floor ceiling stain can easily originate from a second-floor bathroom.
Step 5: Decide: DIY Repair or Call a Professional
Some sources never require opening the wall at all. A loose compression fitting under an adjacent sink, a failed washing-machine supply hose, or a toilet supply line weeping at floor level are all reachable. Failures inside the wall cavity are different. A pinhole leak in copper pipe, a failed solder joint, a corroded galvanized pipe, or a cracked drain pipe fitting all need wall access and usually a licensed plumber. Call a leak detection specialist when valve testing cannot isolate the source. Call one when elevated readings span a wide area, when the failure involves drain lines, when mold is visible, or when the leak may sit under a slab. Hand the leak detection professional your grid readings and photos. Targeted access holes almost always beat exploratory demolition, and they shrink the pipe repair and drywall repair that follows.
Step 6: Dry and Document Before You Close the Wall
Stopping the leak is only half the repair. The EPA advises drying wet materials within 24-48 hours, and notes that in most cases mold will not grow if you hit that window. It is a practical benchmark, not a guarantee. It also assumes ordinary indoor temperatures and a cellulose-rich material such as paper-faced drywall. Drywall that has stayed wet more than 48 hours often cannot be saved. Run an air mover and a dehumidifier, or bring in a restoration contractor. Professional remediation works to the ANSI/IICRC S500 standard, now in its fifth edition, published in 2021; the S500 standard defines how structural drying and water damage restoration should be performed. Keep every photo, moisture reading, and timestamp. That record strengthens a claim, as our guides to water leak insurance claims and whether homeowners insurance covers water damage explain.
Tips and Troubleshooting
The meter shows nothing, but the wall is wet. Intermittent drain-line failures release water only when a fixture drains. Run the shower or washing machine for 10 minutes, then re-scan. Condensation and failed window or roof flashing also mimic plumbing leaks.
Moisture readings are high everywhere. Water has traveled. Follow the readings uphill toward plumbing rather than trusting the wettest spot.
The stain sits near a water heater. Check the appliance before the wall: see what causes a water heater to leak.
Nothing adds up. Stop. Exploratory demolition is an expensive way to be wrong.
Catch the Next One in Hours, Not Weeks with a Bluebot Meter
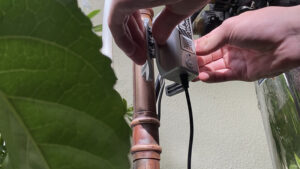
The hard part of behind-the-wall leak detection is not method. It is timing. By the time drywall stains, insulation and framing have usually been soaking for days. Bluebot closes that gap. A Bluebot smart water meter clamps onto the pipe you care about and watches flow continuously, alerting you when water runs during a period that should read zero. Continuous flow monitoring also produces timestamped evidence of exactly when abnormal flow began, which is precisely the data an insurer wants. It monitors and alerts; it does not stop a leak, and it does not replace the in-wall water leak diagnosis above.
Bluebot goes on the line you actually suspect, not just the main: under a bathroom sink, on the washing-machine supply, or on the branch feeding the wall you have been scanning. There is nothing to cut and no plumber to book. The 50-W (Bluebot Mini) starts at $258.76 and fits 3/4″ to 1″ pipe. The 100-W (Bluebot Hero) starts at $558.34 and fits 3/4″ to 2″ pipe. Both are Wi-Fi connected, rated for indoor or outdoor mounting, and include 1-Year Premium Data at those 2026 prices. The clamp-on installation takes about 10 minutes and requires no pipe cutting and no plumber.
Related Bluebot Guides
- Sprinkler leak detection
- Find a leak in a sprinkler system
- Save on your water bill
- Bluebot vs Flume comparison
Frequently Asked Questions
How long can a water leak go unnoticed inside a wall?
A leak inside a wall can run for days or weeks before it stains the surface. Concealed wall leak detection usually begins only after that damage appears. The EPA advises drying wet materials within 24-48 hours to keep mold from taking hold, so a leak found in week three is already a restoration project. A smart water meter shortens the discovery window to hours.
Can you find a leak inside a wall without cutting the drywall?
Yes. Detecting a leak inside a wall without cutting the wall open relies on three non-destructive tools: a water meter test to prove flow exists, a pinless moisture meter to map moisture content through the surface, and infrared thermal imaging to spot the cool patches evaporation creates. Cutting is the last step, not the first, and good readings shrink the hole you eventually make.
How much does it cost to find a water leak inside a wall?
A do-it-yourself wall leak investigation costs under $60, because the only purchase is usually a moisture meter at about $30-50. Professional leak detection is priced per visit and varies by market and by how hard the wall is to reach, so ask for a quote before booking. Handing the plumber your grid readings and photos reduces the time billed either way.
Who should I call for a water leak inside a wall?
Call a licensed plumber or a leak detection specialist when valve testing cannot isolate the source, when the failure involves drain lines, or when the leak may sit under a slab. Pinhole leaks in copper pipe and failed solder joints inside the cavity need professional repair. Bring in a restoration contractor separately if building materials have stayed wet.
Does homeowners insurance cover a water leak inside a wall?
It depends on your policy and on how the damage is classified. Insurers generally distinguish sudden accidental damage from long-term seepage, and the Insurance Information Institute reports water damage and freezing as the second most frequent homeowners claim. Timestamped evidence of when abnormal flow began supports the sudden reading. Check your own policy wording and speak with your insurer.
What does a water leak inside a wall smell like?
A leak behind a wall smells musty and earthy, like a damp cellar. That musty smell comes from microbial growth feeding on wet paper-faced drywall and framing, so it signals the cavity has been wet for a while rather than minutes. Pair the odor with a soft patch of wallboard or an expanding stain before you start a low-flow indicator test.