Water leaks hidden inside walls create a frustrating problem: you can see the damage but not the source. By the time water stains appear on drywall or musty odors develop, a leak may have been running for days or weeks—causing structural damage, mold growth, and repair costs that quickly escalate into thousands of dollars. This guide helps you confirm whether a wall leak exists, narrow down its location without unnecessary demolition, and decide the best path forward for repair.
Step 1 – Confirm That a Leak Exists
Before assuming the worst, verify that active water intrusion is occurring. Not every wall stain indicates a current leak—some result from past problems that have since been resolved, condensation issues, or water traveling from distant sources along framing members.
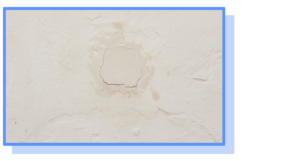
Identify warning signs that suggest an active leak. Fresh water stains typically have defined edges that may still be expanding. Touch the affected area—dampness indicates ongoing moisture intrusion. Bubbling, peeling, or flaking paint often signals water trapped behind the surface. Warped or soft drywall that gives under pressure suggests saturation. Visible mold growth, especially spreading patterns, indicates sustained moisture. Musty odors concentrated in specific areas point toward hidden water accumulation.
Listen for auditory clues. With the house quiet, stand near suspected areas and listen for dripping, hissing, or the sound of running water inside the wall. These sounds are most noticeable when water pressure is high (such as morning hours when supply lines are fully pressurized) or when specific fixtures are running.
Check your water meter to confirm continuous flow. Turn off all fixtures and appliances, then watch your meter’s low-flow indicator or note the reading over a 1-2 hour period. Movement confirms water is flowing somewhere in your system. If the meter shows usage and you’ve ruled out toilets, faucets, and appliances, a hidden leak in the wall becomes more likely.
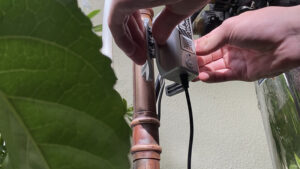
Smart water meters like Bluebot detect continuous flow automatically, alerting you when water runs during periods that should show zero usage. This monitoring catches wall leaks often within hours of starting—before visible damage appears—by identifying the abnormal usage pattern rather than waiting for water to soak through drywall.
Step 2 – Narrow Down the Leak Location
Once you’ve confirmed active water intrusion, systematic investigation helps pinpoint the source without cutting into walls unnecessarily.
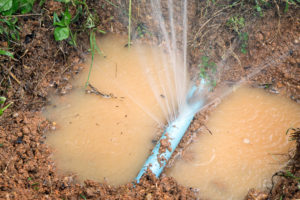
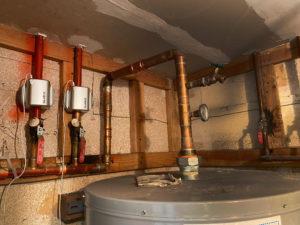
Map the plumbing behind affected walls. Water supply lines and drain pipes typically run vertically through walls between floors and horizontally through ceilings and floor cavities. Damage appearing near bathrooms, kitchens, or laundry rooms suggests supply or drain line issues. Stains that align vertically often indicate supply line leaks (which are under constant pressure), while stains near drain locations may point to waste line failures (which leak only when water drains).
Use isolation testing. Shut off the water supply to individual fixtures using their dedicated valves, then monitor your water meter. If closing the bathroom supply valve stops the meter movement, the leak is in that fixture’s supply line. This process of elimination narrows the search area before any exploratory demolition.
Try non-destructive detection methods. A moisture meter (available at hardware stores for $30-50) measures moisture content in building materials through the surface. Scan the wall in a grid pattern, noting areas with elevated readings—the highest moisture concentration often indicates proximity to the leak source. Infrared thermometers can detect temperature differences caused by evaporating water, appearing as cool spots on the wall surface.
Consider the water’s travel path. Water follows gravity and the path of least resistance, often traveling along pipes, framing members, or wire runs before emerging far from the actual leak point. A stain on a first-floor ceiling might originate from a second-floor bathroom, with water running along a joist before dripping through. Trace potential pathways upward and toward plumbing locations.
Document your findings. Photograph all visible damage, note moisture meter readings with their locations, and record any sounds heard. This documentation helps plumbers locate problems faster and supports insurance claims by establishing the scope and timing of damage discovery.
Step 3 – Decide on Repair or Escalation
After gathering information, assess whether the situation requires professional intervention or falls within DIY repair range.
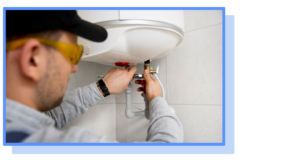
Evaluate repair complexity. Some wall leaks result from accessible problems: a loose compression fitting under an adjacent sink that’s dripping into the wall cavity, a failed washing machine supply hose behind the drywall, or a toilet supply line leaking at floor level. These repairs don’t require opening walls. However, leaks within the wall cavity itself—pinhole leaks in copper pipes, failed solder joints, corroded galvanized lines, or cracked drain fittings—require wall access and often professional repair skills.
Understand when professional help is necessary. Call a plumber or leak detection specialist when you cannot isolate the leak source through valve testing, when moisture readings span large areas suggesting multiple leak points or extensive water travel, when the leak appears to involve drain lines (which require specialized repair), when mold growth is visible or suspected, or when the leak may be within a slab foundation.
Plan the repair strategically. Armed with your investigation data, plumbers can often target their access holes precisely rather than opening large wall sections exploratively. Share your moisture meter readings, isolation test results, and any sounds you’ve noticed. This preparation typically reduces labor time and repair costs significantly.
Address water damage promptly. Even after stopping the leak, saturated building materials require attention. Drywall that has been wet for over 48 hours often cannot be saved and may harbor mold growth. Proper drying with fans and dehumidifiers—or professional water damage restoration for significant intrusion—prevents secondary damage and health hazards.
For insurance claims, the distinction between “sudden” and “gradual” damage determines coverage. Real-time water monitoring provides timestamped usage data showing exactly when abnormal flow began—evidence that supports claims by documenting the leak as a recent occurrence rather than long-term seepage that policies typically exclude.
Conclusion
Finding a water leak inside a wall requires patience and systematic investigation, but most homeowners can narrow down the source significantly before calling a professional. Start by confirming active water flow through meter testing and visual indicators. Use isolation testing and moisture detection to identify the affected area. Then make an informed decision about DIY repair versus professional intervention based on the leak’s location and complexity.
The real challenge with wall leaks isn’t detection—it’s catching them before extensive damage occurs. By the time water stains appear through drywall, a leak has often been running for days or weeks, saturating insulation, framing, and subfloor materials. Bluebot smart water meters address this timing problem by monitoring your water flow continuously, alerting you the moment usage patterns suggest a hidden leak. The non-invasive clamp-on installation takes approximately 15 minutes, requires no pipe cutting or plumber, and begins protecting your home immediately—catching wall leaks while they’re still measured in hours rather than discovering them after they’ve caused thousands of dollars in damage.