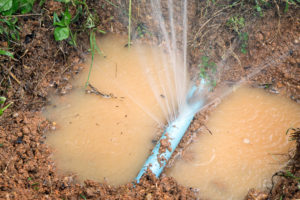
Installing your own water meter gives you visibility into consumption that utility meters alone can’t provide—whether you’re tracking usage on a well system, submetering rental units, or simply want real-time data to catch leaks before they become expensive problems. This guide walks through both traditional inline installation (which requires cutting into your plumbing) and modern non-invasive options that clamp onto existing pipes without any modifications. By the end, you’ll know exactly which approach fits your situation and how to complete the installation yourself.
Step 1 – Identify Your Water Line and Installation Location
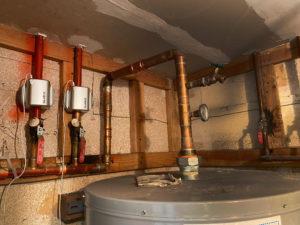
Before purchasing any meter, you need to locate your main water line and identify a suitable installation spot. For most homes, the main incoming water line enters through the basement, crawlspace, garage, or utility closet near the municipal shutoff valve or well pressure tank. Look for a straight section of pipe at least 10-15 pipe diameters long without bends, fittings, or valves immediately upstream. This straight run ensures accurate flow measurement regardless of which meter type you choose. Avoid locations directly after elbows or tee fittings, as turbulent water flow in these areas can affect meter readings. While inspecting your plumbing, confirm the pipe material and diameter. Common residential materials include copper (Type L and M), PVC (Schedule 40 and 80), CPVC, PEX, and galvanized steel. Measure the outside diameter of the pipe—most homes have 3/4″ or 1″ main lines, though older homes or those with higher demand may have 1-1/4″ or larger. This information determines which meters are compatible with your system and whether adapters might be needed.
I’ll write both SEO blog posts for you based on the briefs provided. Let me format them correctly for easy copy-paste into Google Docs.
Step 2 – Decide Between Traditional vs. Non-Invasive Installation
The biggest decision in water meter installation is whether to cut into your existing pipe or use a non-invasive clamp-on design. Each approach has distinct trade-offs worth understanding before you commit.
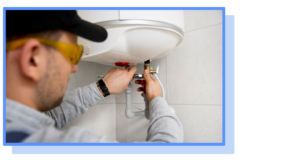
Traditional inline meters require shutting off your water supply, cutting a section of pipe, and installing the meter between two new connections using compression fittings, threaded adapters, or soldered joints. This approach works with mechanical meters (positive displacement or multi-jet designs) that have been industry standards for decades. However, an inline installation means hours without water service, risk of leaks at new connection points, and typically requires plumbing experience or professional help, costing $200-$500 in labor alone.
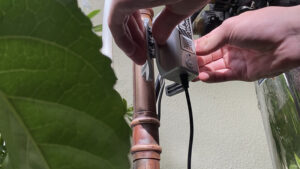
Non-invasive clamp-on meters use ultrasonic technology to measure water flow through the pipe wall without cutting or modifying the pipe. Bluebot’s patented Transit-Time Ultrasonic Technology attaches to the outside of your existing pipe, completing installation in approximately 15 minutes with no tools required. Because nothing penetrates the pipe, there’s zero risk of leaks, no water service interruption, and no need for a plumber. This approach works on copper, PVC, CPVC, PEX, and other common materials across 80+ pipe types and size combinations.
Step 3 – Prepare Tools and Installation Requirements
Your preparation needs differ dramatically depending on which installation method you’ve chosen.
For traditional inline meter installation, gather pipe cutters appropriate to your pipe material, the correct fittings and adapters for your meter connections, thread sealant tape or pipe dope, adjustable wrenches, and, if working with copper, a propane torch and solder. You’ll also need towels and a bucket to catch residual water when cutting into the line. Budget 2-4 hours for the complete installation process, including time for the water to drain and connections to cure or set properly.
For clamp-on smart meters like the Bluebot WiFi Smart Water Meter, preparation is minimal. Confirm you have WiFi coverage at the installation location (or choose Bluebot ProLink for locations up to 1,000+ feet from your router), verify your pipe size falls within the meter’s range, and ensure you can access the pipe to attach the sensor. The meter arrives ready to install with all necessary mounting hardware included—no additional tools or materials required.
Step 4 – Install the Water Meter
With preparation complete, you’re ready for the actual installation.
For a traditional inline meter, start by shutting off water at the main valve and opening a downstream faucet to relieve pressure and drain the line. Cut out a section of pipe that matches your meter’s length and the fitting requirements. Install shutoff valves on either side of the meter location (recommended for future maintenance access), then connect the meter between them using appropriate fittings for your pipe material. Ensure the meter’s flow direction arrow points in the direction water travels through your system. Once all connections are secure, slowly restore water pressure while checking each joint for leaks. Even small drips require attention—shut off, disassemble, reseal, and try again.
For a clamp-on meter like Bluebot, the process is far simpler. Clean the pipe surface where the sensor will mount to remove dirt, corrosion, or loose paint. Apply the included coupling gel to ensure good acoustic contact between the sensor and the pipe wall. Secure the sensor to the pipe using the adjustable mounting bracket, positioning it according to the quick-start guide for your specific pipe material and size. The entire process takes about 15 minutes, and your water never stops flowing.
Step 5 – Activate, Test, and Calibrate the Meter
Installation is only complete once you’ve verified accurate operation.
For traditional mechanical meters, turn on a fixture with known flow (such as filling a 5-gallon bucket while timing how long it takes) and confirm the meter reading advances appropriately. Most mechanical meters display flow in gallons or cubic feet on an analog register. Check that the reading matches your expected consumption within a reasonable margin—significant discrepancies may indicate installation issues, air in the lines, or a defective meter.
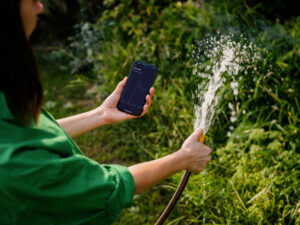
Smart meters like Bluebot connect to your smartphone during initial setup. Download the Bluebot app, create your account, and follow the on-screen pairing process to connect your meter to WiFi. Once connected, run water at various fixtures and watch real-time flow data appear in the app. Bluebot’s self-adjusting technology automatically calibrates to your specific pipe, delivering accuracy of ±0.5% to ±2.0% without manual adjustment. You’ll see 43,200 data points per day—a reading every 2 seconds—giving you unprecedented visibility into exactly how water moves through your home.
Step 6 – Start Monitoring Usage and Identifying Leaks
With your meter operational, the real value begins: understanding your water consumption patterns and catching problems early.
During your first week, check usage data daily to establish your baseline. Note typical consumption during morning routines, evening hours, and overnight periods when no water should be flowing. Any overnight usage (even small amounts) may indicate running toilets, dripping faucets, or slow leaks that waste water 24/7.
Smart meters transform this monitoring from manual meter reading to automated alerts. The Bluebot Mini and WiFi models send immediate notifications when flow patterns deviate from your established baseline—catching leaks often within minutes rather than discovering problems weeks later through rising utility bills. This early detection is particularly valuable because it can prevent the kind of gradual water damage that homeowners’ insurance typically won’t cover.
Properties with smart water monitoring typically discover leaks 75% faster than those relying on monthly bill review, potentially saving thousands of gallons of waste and preventing water damage before it starts.
Conclusion
Installing a house water meter is well within reach for most DIY homeowners, though the experience varies dramatically between traditional and non-invasive approaches. Inline meters provide proven accuracy but require plumbing skills, specialized tools, water service interruption, and careful attention to prevent leaks at new connections. Non-invasive clamp-on meters like Bluebot deliver the same measurement accuracy without any of those complications—install in 15 minutes, keep your water running, and start monitoring immediately.
Whether you’re tracking well usage, submetering rental units, or simply want visibility into your home’s water consumption, the right meter pays for itself through leak detection, conservation insights, and peace of mind. Explore Bluebot’s complete product line to find the smart water meter that fits your pipes, your property, and your goals.